

How To Photoshop Frizzy Hair
Fight the frizz with these ideas on how to edit flyaway hair in Photoshop
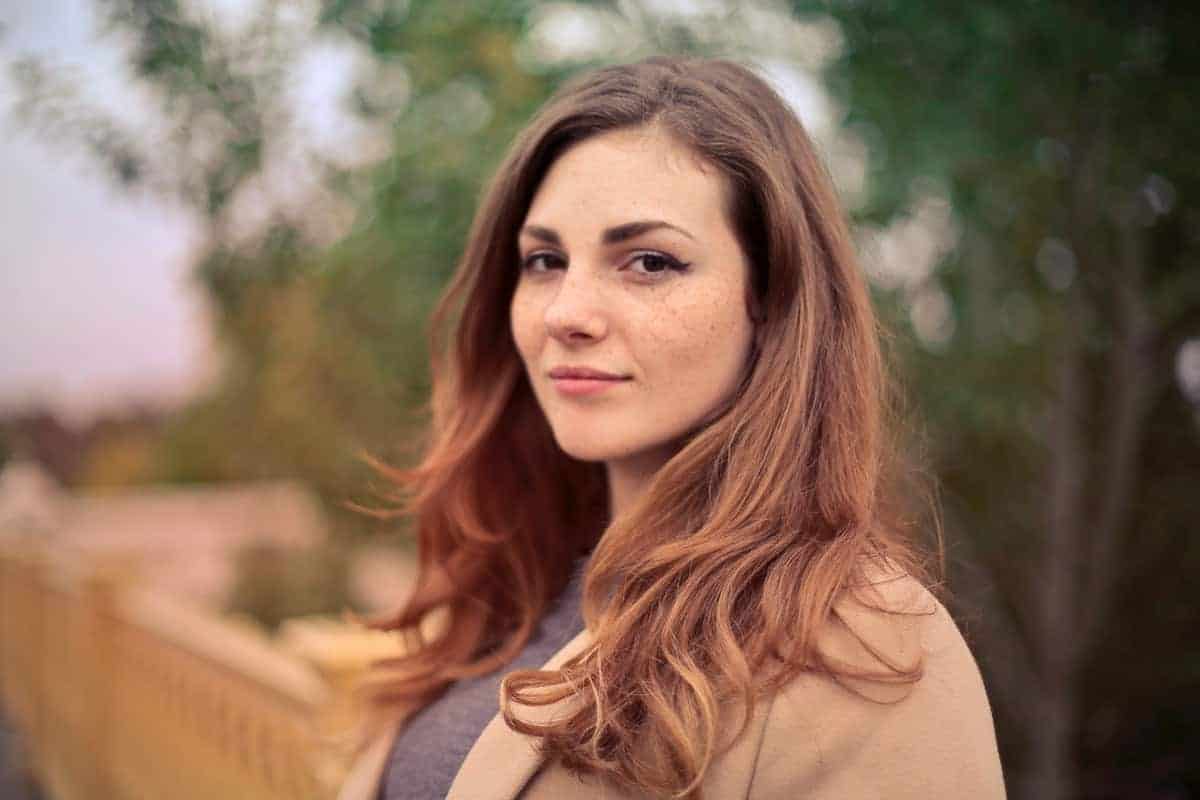
Ane thing nosotros don't have a shortage of here in Wyoming is wind. We joke that our windsocks should be made out of tow bondage and then they'd last longer. We also have a pretty dry out climate. And then rowdy hair is something I take to contend with in many a photoshoot. Knowing how to edit flyaway pilus in Photoshop is a must for me!
So how can you lot tame the frizzies? Our first course of action should e'er be to become it right in camera. Simply sometimes we need a little help from mail-product. In this mail, we'll talk nearly some preventative measures and five different ways to fix those annoying little hairs and make clean up the crazy hair!
 Hair shouldn't be perfect
Let me start by saying hair shouldn't be perfect. Role of what makes a compelling portrait is authenticity. So if your customer has naturally curly hair, hair with a lot of book or a personality that is more than coincidental and laid back, editing every single hair into perfection will feel forced. And no one should e'er experience inferior because their hair isn't perfect. Photoshoots should empower, not diminish.
Too, having hair flight every-which-way or a messy look is your artistic choice. Hair tin help convey attitude and movement. That's awesome too. Your client, your image, your decision!
Only sometimes hair gets away from the states and nosotros need tools to gear up it. Or nosotros are working on a loftier-cease, very refined image that demands make clean, sleek lines. That's where this post comes in…when wild pilus is a result of the environment and non the choice of the customer or the photographer.
What causes flyaway hair and hair static?
Current of air, static and pilus that pulled free of ties or barrettes tin can all cause flyaway hair. Hats, fleece headbands and pulling wearing apparel over your head as well causes static cling. When two unlike objects rub against each other (like hair and a fleece sweatshirt), the procedure transfers electrons from one object to the other. The swap causes a kind of electrical charge to build up on your hair. If there'southward no moisture in the pilus or in the air, that charge causes hairs to repel one another. So hair stands up and looks wild. That's your science lesson for the twenty-four hour period!
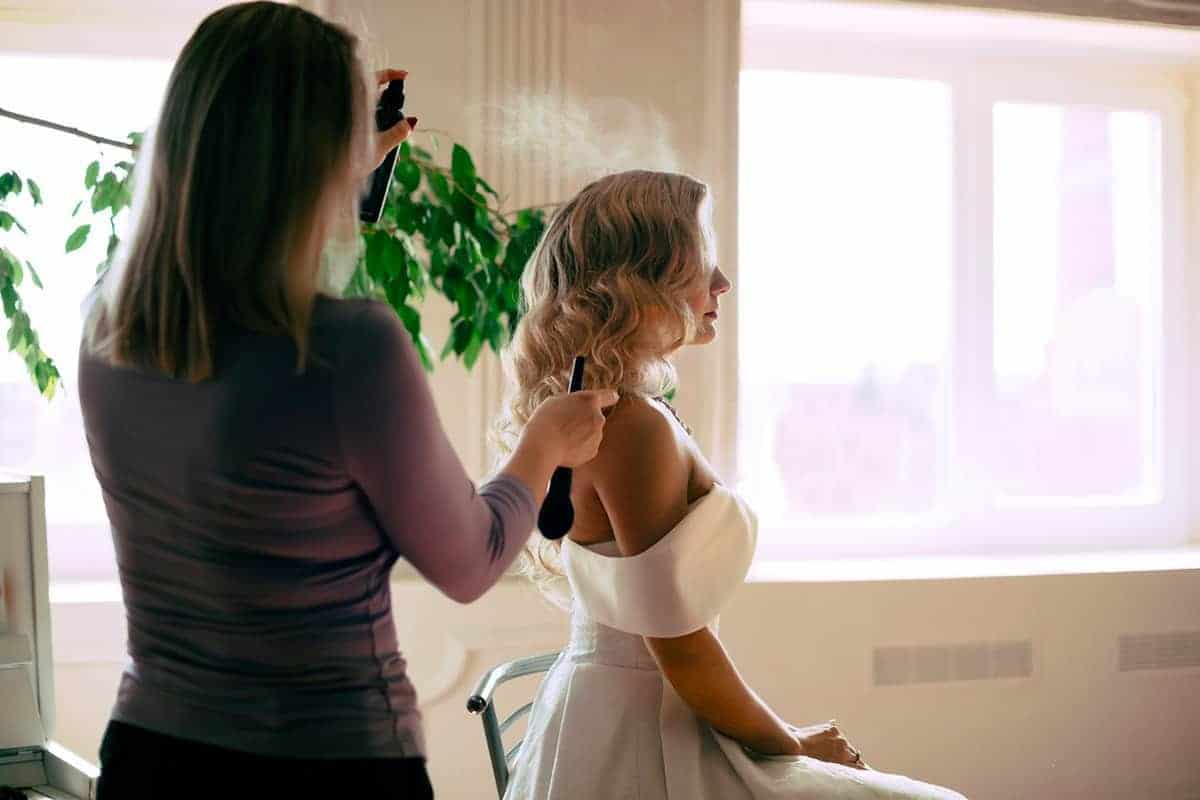
Fixing flyaway pilus and static hair on scene
As I said before, our goal should always exist to get the scene right in-camera. It looks more natural and saves you time and endeavour in post-production. Here's a few tips to set static hair before yous always fire the shutter.
- Encourage clients to practice all-time hair management! Include tips like using hairspray, getting dressed before fixing pilus and avoiding hats in your client prep guide.
- Give your subjects a once over before shooting. Make sure ponytails are snug, buns are secure and clips are fully fastened. Sometimes a quick fix is all you need!
- Watch the wind. Even a gentle breeze tin can accident hairs out of identify. If you lot can't exit of the air current, try facing your discipline into the wind. The breeze will blow her hair behind her instead of up into her confront.
- Shoot hat images last, if possible. Hats can create static (or crusade hat caput and a red mark on the brow among other problems). Salve the hat images for concluding if at all possible!
Stylist tricks to tame wild locks
If y'all can't avoid frizz and flyaways, help get them dorsum in place with these elementary tips from a hairstylist!
- Keep a minor canteen of smoothing pilus oil in your photography kit. A small amount tin can give your client's dry hair a bit of lustre and help smooth out the frizzy $.25.
- Anti-flyaway sheets are another slap-up tool for your bag! Look for something like the Redken Frizz Dismiss SPF 10 Fly-Away Fix Finishing Sheets.
- Effort a dryer sheet! Some people written report having corking luck using plainly-quondam dryer sheets. Accept your client wipe down their hair with 1. If she'due south using a hat, rub the within of the hat with a dryer sheet to assist forestall the frizz.
- Instead of a spray or wipe, use a metallic rummage sprayed with hair spray. Accept your client comb his pilus from root to tip. The metallic comb absorbs some of the static from the hair. The hair spray too helps tame the flyaways.
- In a pinch and demand a fix fast? Try a small amount of hand or face balm. Take your client rub a pocket-size amount between her palms and so polish it out over her hair.

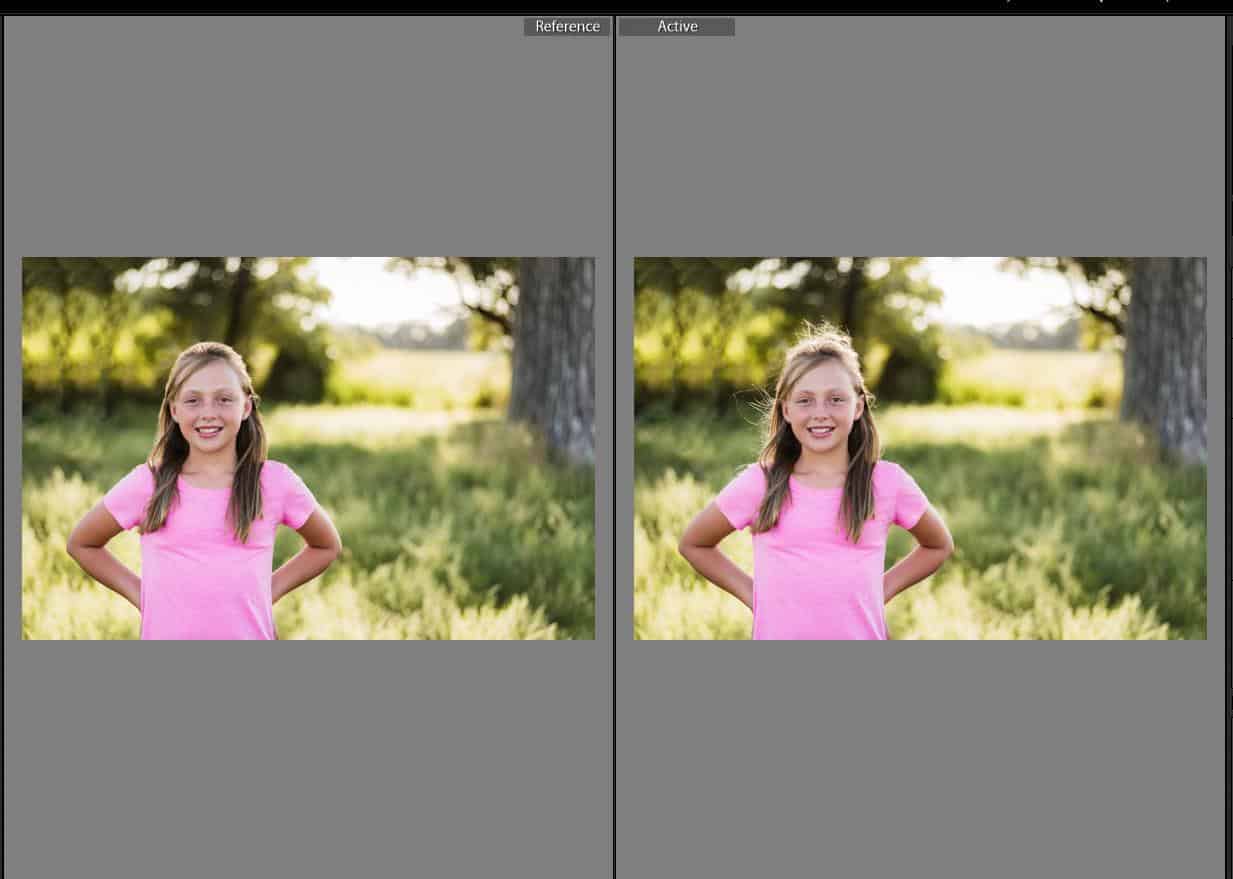
Edit flyaway hair in Photoshop
So you couldn't or didn't become the hair under control during your photoshoot. Information technology happens. Sometimes nosotros get in a hurry and don't pay attention to details similar the hair, sometimes a flyaway is so small-scale nosotros only tin can't run into it. And sometimes, at that place'southward only no avoiding it. When yous accept to edit flyaway hair in Photoshop, hither are a few different methods to try.
In that location's no one best method…like with and so many things in fine art, at that place are dissimilar means to accomplish the same task. Use the method that works best for y'all, your skill level and the specific image you lot are editing.
I don't give step-by-step instructions in the mail service below. This isn't meant to be an in-depth tutorial. Rather, it'due south a wild pilus roundup. I'll depict a few dissimilar methods I find helpful when I need to edit flyaway hairs in Photoshop and links to the videos demonstrating the process.
You will need to understand a few Photoshop basics to complete these techniques. This includes choosing a castor and changing the size and softness, making and inverting layer masks, and rendering your final paradigm.
Need to learn more about layer masks? We take y'all covered!
Method #ane : The Spot Healing brush
This is the near straight-forrad method and involves a unmarried Photoshop tool. It works best with single hairs flying abroad from the face or other hairs, but can also work for hairs falling across the face.
Start past creating a new layer. Choose the spot healing brush from the Tools bar. Make your brush just larger than the hair. Trace over the pilus and permit the spot healing castor piece of work its magic. If the hair falls in front end of the eye our mouth, try using the spot heal brush in sections. For case, use the spot heal commencement in the forehead, then the eyebrow, then the upper eyelid. The brush is less probable to grab colors/texture from the unrelated parts that mode.
Run across this method in activity at https://youtu.be/L2RBYuJB0iA
Method #two: The Healing Brush tool
This method is similar to Method #one but uses the Healing Castor tool instead of the Spot Healing brush. I detect it goes faster than
Commencement by creating a new layer. Choose an area to sample that is similar to the area where the hair is located. Then using the sample area, paint over the flyaway hairs. This can work better than the Spot Healing brush because you are choosing where to sample, non leaving it up to Photoshop. I notice this method helps if the hair is on the face or article of clothing. I adopt the healing castor tool to the clone postage stamp tool because it blends more seamlessly for me.
If you don't want to eliminate the hairs only but brand them less noticeable, you can adjust the opacity of your layer at the cease.
Meet this method in use at https://youtu.exist/1yB_w0SA5IQ
Besides much Photoshop tin exist a bad matter! See when Photoshop goes bad!
Method #3: Surface Blur
Our tertiary method to edit flyaway hair in Photoshop uses a Surface Blur mask. With this technique, y'all harness the power of Photoshop to blend those small hairs into oblivion. This works best on soft backgrounds with very little texture. If you lot're trying to fix a hair on the face up or vesture, skip this method and use ane of the previous 2 choices instead.
Start past creating a new layer. Then choose Filter – Mistiness – Surface Blur. Yous'll need to accommodate the Radius and Threshold to suit your image. The radius is the distance out from each pixel that you want affected by the filter (in this case, surface blur is the filter.) Threshold determines how unlike next pixels must be before they are considered edge pixels and thus, affected by the filter. The higher the threshold value, the greater contrast there must be between pixels. Play around with the sliders until those pesky hairs fade away.
Next, you'll turn the blurred layer into a layer mask. Cull Layer-Layer Mask – Hibernate All, or utilize select the layer mask from the Layers dialog box and capsize it. Using a hard white brush, paint over the flyaway hairs. One of the benefits of this method is that information technology requires less patience and accurateness than the spot healing or healing castor tools.
To see this method in activeness, visit https://youtu.be/nPAvr5_CWl8
I've also seen this method using a Gaussian blur filter and mask. Try both if you'd like and see which suits your way better!
Non sure if you lot need Photoshop or Lightroom? Read our guide!
Method #4: 3-Step Workflow
This workflow uses 3 different processes to edit flyaway hair in Photoshop. Yous'll start by using the clone postage stamp tool (on a new layer of course!). Then you lot'll create a rough mask that eliminates most of the flyaways. And finally, you'll refine the mask to go along the texture and outline of most of the hair but ditch those wonky hairs.
This procedure is much amend watched than read. Bank check it out at https://www.youtube.com/watch?v=obCmWXhXwvg&fbclid=IwAR1cJ80Li0Vai6OQ7xilasWwkzXErona8Kf1Dkrk3ASLaTqL0dBOP8IuJ-0
This video, featuring Unmesh Dinda from Piximperfect, teaches yous how to complete this process with a mouse or a tablet. He besides introduces the concept of editing with the menstruum of the hair to proceed it looking real and natural.
This process works great for solid color backgrounds or backgrounds with a slight slope. This workflow is great if you have a number of unruly hairs and need something chop-chop.
Method #5: DSL – a 3-Stride Procedure for busy backgrounds
And so far, most of the techniques we've used work for solid color backgrounds. Just what if yous were shooting outside and have a multi-colored or more than complicated groundwork? Only remember DSL – dust and scratches, spot healing castor and liquefy. It'southward some other technique taught by Dinda from the video above.
You lot'll start with calculation a filter to blur out the single stray hairs using the dust and scratches filter. To keep the texture of the background, yet, you'll besides add some dissonance dorsum into the paradigm. And so y'all'll make clean upwardly the image with the spot healing brush and stop off with the liquefy tool.
I discover this method helpful if yous have a big wad of misbehaving hair. The liquefy technique Dinda describes is perfect for slowly easing those large chunks of messy pilus back into place. This is the most involved method of the three and takes the longest considering it has the virtually steps. But for catchy backgrounds or really crazy pilus, I find it works great!
Bank check out what I was able to reach on an edit using this method.
To see the video tutorial, watch below or visit https://world wide web.youtube.com/watch?5=AEUjUp7hCPc&fbclid=IwAR0BdySr_7HePVKupsiyooDGYj74Tt3gpIlUTTAFPVYWybXlqIfCWQ-iQE8
Crazy Hair Happens
Of form, we ever desire to make sure our clients look their all-time before we burn the shutter. But sometimes, crazy hair happens despite our best efforts. The adjacent time you lot find an image having a bad pilus day, use i of these methods to edit flyaway pilus in Photoshop. Try each method a few times to get a existent feel for them and to decide which ane is the best for you. Soon you'll know which method to use on which epitome depending on the level of craziness in the hair or groundwork.
I too find learning new techniques to edit in Photoshop helps me up my skills in the software overall. I might never use Method #4 once more, simply going through the procedure two or iii times makes me more comfy with the software overall.
So the next time you've got an prototype with a hair nightmare, don't despair. Try one of these methods and tame that 'practise!
Source: https://www.colesclassroom.com/edit-flyaway-hair-in-photoshop-5-methods-to-achieve-sleek-and-smooth/
Posted by: solistheirse.blogspot.com
0 Response to "How To Photoshop Frizzy Hair"
Post a Comment